Programming Apple Push Notification Services

POSTED BY WEIMENGLEE 1 YEAR 13 WEEKS AGO
One of the key limitations of the iPhone is its constraint on running applications in the background. Because of this, applications cannot keep running in the background when the user switches to another application. So, applications that require a constant state of connectivity (such as social networking applications) will not be able to receive timely updates.
To remedy this limitation, Apple released the Apple Push Notification Service (APNs). The APNs is a service that allows your device to be constantly connected to Apple's push notification server. When you want to send a push notification to an application installed on the users' devices, you (the provider) can contact the APNs so that it can deliver a push message to the particular application installed on the intended device.
In this article, you will learn how to perform the various steps needed to create an iPhone application that uses the APNs.
Generating a Certificate Request
The first step to using the APNs is to generate a certificate request file so that you can use it to request for a development SSL certificate later on.
1. Launch the Keychain Access application in your Mac OS X.
2. Select Keychain Access'Certificate Assistant'Request a Certificate From a Certificate Authority (see Figure 1):

Figure 1. Generating a certificate request
3. Enter the information required and check the Saved to disk option. Click Continue (see Figure 2).

Figure 2. Saving the certificate request to disk
4. Save the certificate request using the suggested name and click Save (see Figure 3): Click Done in the next screen.

Figure 3. Naming the certificate request
Creating an App ID
Each iPhone applications that uses the APNs must have a unique application ID that uniquely identifies itself. In this step, you will learn how to create an App ID for push notification.
1. Sign in to the iPhone Developer Program at: http://developer.apple.com/iphone/. Click on the iPhone Developer Program Portal on the right of the page (see Figure 4).

Figure 4. Launching the iPhone Developer Program Portal
2. You should see the welcome page (see Figure 5).

Figure 5. The welcome screen of the iPhone Developer Program Portal
3. Click on the App IDs tab on the left and then click on the New App ID button (see Figure 6).

Figure 6. Clicking on the App ID tab
4. Enter "PushAppID" for the Description and select Generate New for the Bundle Seed ID. For the Bundle Identifier, enter
net.learn2develop.MyPushApp. Click Submit (see Figure 7).
Figure 7. Creating a new App ID
5. You should now see the App ID that you have created (together with those you have previously created) (see Figure 8).

Figure 8. Viewing the newly created App ID
Configuring an App ID for Push Notifications
Once an App ID is created, you need to configure it for push notifications.
1. To configure an App ID for push notification, you need to click the Configure link displayed to the right of the App ID. You will now see the option (see Figure 9).

Figure 9. Configuring an App ID for push notification service
Check the Enable for Apple Push Notification service option and click the Configure button displayed to the right of the Development Push SSL Certificate.
2. You will now see the Apple Push Notification service SSL Certificate Assistant screen. Click Continue (see Figure 10).

Figure 10. The Apple Push Notification service SSL Certificate Assistant screen
3. Click the Choose File button to locate the Certificate Request file that you have saved earlier. Click Generate (see Figure 11).

Figure 11. Generating the SSL certificate
4. Your SSL Certificate will now be generated. Click Continue (see Figure 12).

Figure 12. The APNs SSL certificate that is generated
5. Click the Download Now button to download the SSL Certificate. Click Done (see Figure 13).

Figure 13. Downloading the certificate generated
6. The SSL Certificate that you download is named
aps.developer.identity.cer. Double-click on it to install it in the Keychain Access application (see Figure 14). The SSL certificate will be used by your provider application so that it can contact the APNs to send push notifications to your applications.
Figure 14. Installing the generated certificate into the Keychain Access application
Creating a Provisioning Profile
The next step is to create a provisioning profile so that your application can be installed onto a real device.
1. Back in the iPhone Development Program Portal, click on the Provisioning tab and click on the New Profile button (see Figure 15).

Figure 15. Selecting the Provisioning tab
2. Type in
MyDevicesProfile as the profile name. Select PushAppID as the App ID. Finally, check all the devices that you want to provision (you can register these devices with the iPhone Developer Program Portal through the Devices tab). Click Submit (see Figure 16).
Figure 16. Creating a new provisioning profile
3. The provisioning profile will now be pending approval. After a while, you will see it appear. Click on the Download button to download the provisioning profile (see Figure 17).

Figure 17. Pending the approval of the provisioning profile
4. The downloaded provisioning profile is named MyDevicesProfile.mobileprovision.
Provisioning a Device
With the provision profile created, you will now install it onto a real device.
1. Connect your iPhone or iPod Touch to your Mac.
2. Drag and drop the downloaded
MyDevicesProfile.mobileprovision file onto the Xcode icon on the Dock.3. Launch the Organizer application from within Xcode and select the device currently connected to your Mac. You should see the
MyDevicesProfile installed on the device (see Figure 18).
Figure 18. Viewing the installed provisioning profile
Creating the iPhone Application
1. In Xcode, create a new View-Based Application project and name it as ApplePushNotification.
2. Drag and drop a WAV file (shown as
beep.wav in this example) onto the Resources folder in Xcode (see Figure 19).
Figure 19. Adding a WAV file to the project
3. Expand on the Targets item in Xcode and select the ApplePushNotification item. Press Command-I. In the Info window, click the Properties tab (see Figure 20).

Figure 20. Entering the App ID for the application
In the Identifier textbox, type <
net.learn2develop.MyPushApp.4. Click on the Build tab and type "Code Signing" in the search box. In the Any iPhone OS Device item, select the profile as shown in Figure 21:

Figure 21. Selecting the profile for code signing
5. In the
ApplePushNotificationAppDelegate.m file, type the following code in bold:#import "ApplePushNotificationAppDelegate.h" #import "ApplePushNotificationViewController.h" @implementation ApplePushNotificationAppDelegate @synthesize window; @synthesize viewController; - (void)applicationDidFinishLaunching:(UIApplication *)application { [window addSubview:viewController.view]; [window makeKeyAndVisible]; NSLog(@"Registering for push notifications..."); [[UIApplication sharedApplication] registerForRemoteNotificationTypes: (UIRemoteNotificationTypeAlert | UIRemoteNotificationTypeBadge | UIRemoteNotificationTypeSound)]; } - (void)application:(UIApplication *)app didRegisterForRemoteNotificationsWithDeviceToken:(NSData *)deviceToken { NSString *str = [NSString stringWithFormat:@"Device Token=%@",deviceToken]; NSLog(str); } - (void)application:(UIApplication *)app didFailToRegisterForRemoteNotificationsWithError:(NSError *)err { NSString *str = [NSString stringWithFormat: @"Error: %@", err]; NSLog(str); } - (void)application:(UIApplication *)application didReceiveRemoteNotification:(NSDictionary *)userInfo { for (id key in userInfo) { NSLog(@"key: %@, value: %@", key, [userInfo objectForKey:key]); } } - (void)dealloc { [viewController release]; [window release]; [super dealloc]; } @end
6. Press
Command-R to test the application on a real device. Press Shift-Command-R in Xcode to display the Debugger Console window. Observe carefully the device token that is printed (see Figure 22). In the figure below, the token is:38c866dd bb323b39 ffa73487 5e157ee5 a85e0b7c e90d56e9 fe145bcc 6c2c594b. Record down this device token (you might want to cut and paste it into a text file).
Figure 22. Viewing the device token for push notification
7. If you go to the Settings application on your iPhone/iPod Touch, you will notice that you now have the Notifications item (see Figure 23).

Figure 23. Viewing the Notifications item in the Settings application
Creating the Push Notification Provider
A Push Notification provider is an application written by the application's developer to send push notifications to the iPhone application through the APNs.
Here are the basic steps to send push notifications to your applications via the Apple Push Notification Service (APNs):
1. Communicate with the APNs using the SSL certificate you have created earlier.
2. Construct the payload for the message you want to send.
3. Send the push notification containing the payload to the APNs.
1. Communicate with the APNs using the SSL certificate you have created earlier.
2. Construct the payload for the message you want to send.
3. Send the push notification containing the payload to the APNs.
The APNs is a stream TCP socket that your provider can communicate using a SSL secured communication channel. You send the push notification (containing the payload) as a binary stream. Once connected to the APNs, you should maintain the connection and send as many push notifications as you want within the duration of the connection.
Tip: Refrain from opening and closing the connections to the APNs for each push notification that you want to send. Rapid opening and closing of connections to the APNs will be deemed as a Denial-of-Service (DOS) attack and may prevent your provider from sending push notifications to your applications.
The format of a push notification message looks like Figure 24 (figure from Apple's documentation):

Figure 24. Format of a push notification message
For more details, please refer to Apple Push Notification Service Programming Guide.
The payload is a JSON formatted string (maximum 256 bytes) carrying the information you want to send to your application. An example of a payload looks like this:
The payload is a JSON formatted string (maximum 256 bytes) carrying the information you want to send to your application. An example of a payload looks like this:
{
    "aps": {
        "alert" : "You got a new message!" ,
        "badge" : 5,
        "sound" : "beep.wav"},
     "acme1" : "bar",
     "acme2" : 42
}
To save yourself the trouble in developing a push notification provider from scratch, you can use the PushMeBabyapplication (for Mac OS X) written by Stefan Hafeneger (Get it here).
1. Open the PushMeBaby application in Xcode.
2.
Right-click on the Resources folder in Xcode and select Add Existing Files…. Select theaps.developer.identity.cer file that you have downloaded earlier (see Figure 25).
Figure 25. Adding the SSL certificate to the application
3. In the
ApplicationDelegate.m file, modify the code as shown in bold below:- (id)init { self = [super init]; if(self != nil) { self.deviceToken = @"38c866dd bb323b39 ffa73487 5e157ee5 a85e0b7c e90d56e9 fe145bcc 6c2c594b"; self.payload = @"{\"aps\":{\"alert\":\"You got a new message!\",\"badge\":5,\"sound\":\"beep.wav\"},\"acme1\":\"bar\",\"acme2\":42}"; self.certificate = [[NSBundle mainBundle] pathForResource:@"aps_developer_identity" ofType:@"cer"]; } return self; }
4. Press Command-R to test the application. You will be asked to grant access to the certificate. Click Always Allow (see Figure 26):

Figure 26. Granting access to the SSL certificate
On the iPhone/iPod Touch, ensure that the ApplePushNotification application is not running. To send a message to the device, click the Push button. The server essentially sends the following message to the Apple Push Notification server:
{
    "aps": {
        "alert" : "You got a new message!" ,
        "badge" : 5,
        "sound" : "beep.wav"},
     "acme1" : "bar",
     "acme2" : 42
}
5. If the message is pushed correctly, you should see the notification as shown in Figure 27.

Figure 27. Receiving a Push Notification message
6. If you now debug the ApplePushNotification application by pressing
Command-R and send a push message from the PushMeBaby application, the Debugger Console window will display the following outputs:2009-11-24 21:11:49.182 ApplePushNotification[1461:207] key: acme1, value: bar
2009-11-24 21:11:49.187 ApplePushNotification[1461:207] key: aps, value: {
alert = "You got a new message!";
badge = 5;
sound = "beep.wav";
}
2009-11-24 21:11:49.191 ApplePushNotification[1461:207] key: acme2, value: 42Summary
In this article, you have seen the various steps required to build an iPhone application that utilizes Apple's Push Notification service. I am interested to know how you are using the APNs for your application. Use the comment feature below to share with us!


Step 6 : You can download the source code here.Save,build and run the project. The output will be as follows:


Step 9 : Save,Build & Run the project.When we switch the tabs you will observe the views .


iPhone Local Notifications
NOV 22ND
No comments
Local notifications :
Local notifications are used to notify user that application is having some updates,
while application is not running in foreground. We can display an alert message or badge on application icon. Local notifications can play sound when alert message or badge is shown.
We can use local notification to remind our daily or monthly tasks at particular time like water plants, pay electricity bill, attend seminar , prepare for presentation etc. In these cases we can use local notification.
Create notification :
Cancel any exiting local notification
Allocate and initialize UILocalNotification object
Set fire date and timezone. Fire date is date and time when system should deliver the notification. Date is calculated depending on timezone specified.If we do not specify timezone then it will take GMT as default time zone.
We can control alert message displayed when notification is delivered by setting alertBody and alert action by setting alertAction.
We can also specify sound to be played when notification is delivered by setting soundName and also specify badge number on application icon by setting applicationIconBadgeNumber.
We can also pass custom data with notification by adding it into dictionary. We can add dictionary to notification using userInfo property.
Here we are passing notification text as custom data.
In case if we want to increase icon badge number we can get current badge number by using.
If you want to repeat notification then you can set following property to required calendar unit.
App Idea: Are you working on iPhone/iPad app similar to existing one in Store?
OCT 25TH
Now that there are 300K+ apps on AppStore, there is high possibility that your idea has been implemented and have an app on store for sale. We are getting many requirements from clients about creating an app similar to one in AppStore and at the same time with the concern, whether they can make money out of it?
It is obvious that existing competition for an app idea means that your life is going to be harder. However, it definitely does not mean that their implementation for the app is the best it could be. If you can add something to the already existing idea that can improve the app or make it more appealing, Go ahead!!
In such scenario, you need smart companies well-versed in market research to figure out whether it would be worth the competition. “We are here for you” 
Ask yourself these basic questions:
- Are users who purchased the app happy with the existing app?
- There are chances in the sea of app world that they are not happy about it , find out the roots.
- It can be price structure of the app that users are not happy about. Is it wrongly priced? e.g. Unnecessary in-app purchases at regular intervals of app usage, multi-level unlocking of features with payments, prices are not justified for what they offer etc.
- Can you offer better pricing model?
- Do you have list of superior features including ‘must-have’?
- Do you have enough resources and money to compete with existing app?
Lets DISCOVER the potential of your idea together and have a refreshing app experience for 125 Million iOS users.
Team
Mobisoft Infotech
iPhone UITableView Tutorial: Grouped Table
MAY 11TH
Grouped table view is an extension of the normal table view in iPhone. It displayes the data in several sectioned lists. Each section has a header and number of rows associated with it. Examples of grouped table are the ‘contacts’ list, a dictionary,etc. In this tutorial, we will create a grouped table using a dictionary, to create a names list,unlike the plain table in which we had used an array. So lets get started!
Step 1: Create a view based application and name it ‘GroupedTable’.
Step 2: Put the following code in ‘GroupedTableViewController.h’
Here, we have declared a dictionary to hold the section headers and their respective row contents. And an array to hold the sorted keys of the dictionary.
Step 3: Now, open ‘GroupedTableViewController.m’ file and put the following code in it.
viewdidLoad: Here, we populate the dictionary using three arrays of names as objects and alphabets as keys. Then we sort the array ‘allKeys’ of the dictionary and put it in sortedKeys.
Table Methods
numberOfSectionsInTableView : Returns the count of keys in the dictionary.
titleForHeaderInSection : Returns the value of key for that particular section.
cellForRowAtIndexPath : Here, listdata is an array which is assigned the value for the key corresponding to the respective section. For every section, the contents of listdata are displayed.
didSelectRowAtIndexPath : In this method, we display an alert view when a row is selected.
Step 4 : Open the ‘GroupedTableViewController.xib’. Drag and drop a table view on it. Select the table view and open its Attributes Inspector (command+1). Change the table style from ‘Plain’ to ‘Grouped’.


Step 5 : Open the Connections Inspector (command+2) for the table and link its datasource and delegate to the file’s owner.

Step 6 : You can download the source code here.Save,build and run the project. The output will be as follows:


iPhone TabBar: UITabBarController Tutorial
MAY 7TH
A Tab Bar Controller helps to organize an application along functional lines.It is used to switch between multiple pages in an application. Each tab of a tab bar controller interface is associated with a view controller.Whenever a tab is tapped by a user,the tab bar controller object selects the particular tab and displays the corresponding view associated with the tab.This blog will assist you on how to create applications using tab bar controller.
Step 1 : Start Xcode and create a new project by selecting Window- Based Application.
Step 2 : Open “PrjTabBarControllerAppDelegate.h” and put following code in it.
Here ‘”tcTabBar” is an instance variable of type UITabBarController. We have created an outlet, so that we can relate our instance ‘tcTabBar’ with TabBarController.
Step 3 : Open “PrjTabBarControllerAppDelegate.m” and put following code in it. In the ‘applicationDidFinishLaunching’ method we have added the Tab Bar Controller as a sub view to the existing window. Save the project using (command + S).
Step 4 : Open the Interface Builder by double clicking on MainWindow.xib file. Drag & Drop a Tab Bar Controller from the Library(shift + command + L.). Make sure that the Tab Bar Controller is dropped on the MainWindow.xib since it is not allowed to be placed on the View Controller.We will see a Tab Controller with two bar items created for us. Add one more tab item to it from the library.


As we can see a Tab Bar Item has ‘Title’ & ‘Image’ associated with it. Double Click on Item 1. Open the ‘Attributes Inspector’ (command + 1).In the ‘Atrributes Inspector’ we can set the title & image for Tab Bar Item. The image that we are adding should be present in the Project folder.To add an image to Project right click on ‘Resources’ -> Add -> Existing Files and select the image.


Step 5 : Now connect the Tab Bar Controller to PrjTabBarControllerAppDelegate. Open the ‘Connection Inspector’ (command + 2). Connect “tcTabBar” in the File’s Owner to Tab Bar Controller.

Step 6 : Right click on ‘Classes’ in Group & Files Explorer & add UIViewController subclass file. Select the option ‘With XIB for user interface’. The files added should be equal to number of Tab Bar items present.Here, we add three UIViewController so name them as View1ViewController, View2ViewController, View3ViewController.
Step 7 : Open the View2ViewController.xib by double clicking on it. Set the color of the view from the ‘Attribute Inspector’.Save & Close the .xib file. Similarly set the colours for other views.


Step 8 : Now we need to specify which views should be there in each tab of TabBarController. For this open ‘Interface Builder’. Open ‘Identity Inspector’ (command + 4). Set the class of each Tab Bar Item to its respective view.

Step 9 : Save,Build & Run the project.When we switch the tabs you will observe the views .
You can download the source code here.
Output:


iPhone UIButton tutorial: Radio Buttons
MAY 4TH
Radio buttons is a set of buttons out of which only one can be set at a time. For example: Selecting the time format out of 12-hr and 24-hr in a clock application.They are often required in iPhone UIs. Unfortunately, they are not included in the iPhone sdk. In this tutorial, we will learn how to create custom radio buttons.
Step 1: Create a window based application in Xcode and name it “MIRadioButtonGroup”.
Step 2: Create new “MIRadioButtonGroup.h” and “MIRadioButtonGroup.m” files which extend from UIView.
(Classes >> Add >> New File >> Objective C Class. Select UIView in the “subclass of” list.)
(Classes >> Add >> New File >> Objective C Class. Select UIView in the “subclass of” list.)
Step 3: Create a new group in the Classes folder and name it “MIRadioButtonGroup”. Drag the “MIRadioButtonGroup .h” and “MIRadioButtonGroup .m” files into the group.Now, add the images “radio-on.png” and “radio-off.png” to the group.
Step 4: Open the “MIRadioButtonGroup.h” file and make the following changes in it.
Here, we have declared a mutable array “radioButtons” which will hold all the buttons that we add to the radio button group.
The methods declared are:
initWithFrame – It is a constructor used to initialize the group. It takes the frame for the entire group,an array holding the titles of the buttons and the number of columns in which the buttons are to be arranged as input parameters.
initWithFrame – It is a constructor used to initialize the group. It takes the frame for the entire group,an array holding the titles of the buttons and the number of columns in which the buttons are to be arranged as input parameters.
radioButtonClicked – This method is used to set the button which is clicked.
removeButtonAtIndex – This method is used to remove a radio button at a particular index from the group.
setSelected – This method is used to set the button at the specified index.
clearAll – This method clears all the buttons including the currently set button.
Step 5: Open the “MIRadioButtonGroup.m” file and put the following code in it.
initWithFrame – In this method, we first divide the frame into n number of boxes with width framex and height framey, where n =([options count]/columns)*columns. Then we check to see if there is any remainder for ([options count]/columns). The reason for this will be explained later.
In the proceeding nested “for” loops, we set the frames of the buttons so that each button occupies 50% space of each of the n boxes. After that we link the button programmatically to the “radioButtonClicked” method. We set the alignment of the content(radio button image and title) to left. Then we set the image for the button, configure its font color and font size and set its title.
In the proceeding nested “for” loops, we set the frames of the buttons so that each button occupies 50% space of each of the n boxes. After that we link the button programmatically to the “radioButtonClicked” method. We set the alignment of the content(radio button image and title) to left. Then we set the image for the button, configure its font color and font size and set its title.
This code works fine when the number of buttons is perfectly divisible by columns, but when it is not, the remaining buttons are not printed.
Now, the remainder comes in picture. What we do is, if there is a non-zero remainder, we add 1 to the divisor in framey equation,so that there is space for an extra row in the frame. In the next “for” loop, we insert that extra row and hence, cover the missing buttons.
Now, the remainder comes in picture. What we do is, if there is a non-zero remainder, we add 1 to the divisor in framey equation,so that there is space for an extra row in the frame. In the next “for” loop, we insert that extra row and hence, cover the missing buttons.
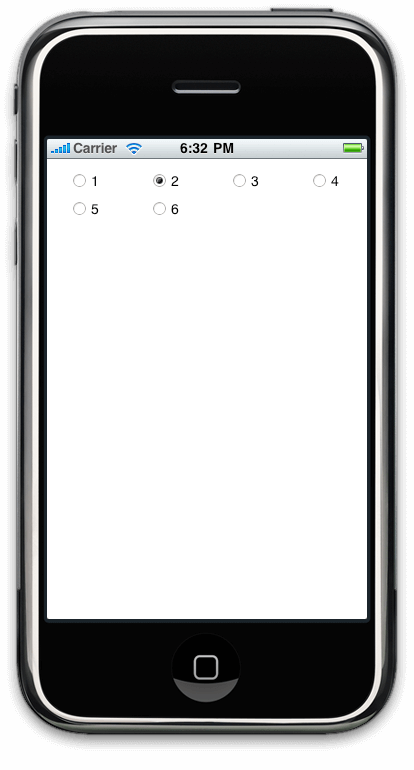
radioButtonClicked – Here, we first clear all the buttons in the “radioButtons” array by setting their images to “radio-off.png”. Then, we set only the sender button by setting its image to “radio-off”.
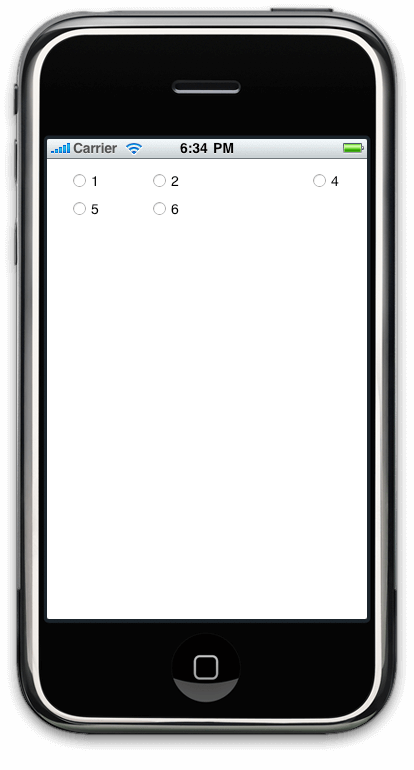
removeButtonAtIndex – In this method, we remove the button at the specified index with the “removeFromSuperview” method.
setSelected – This method is similar to the “radioButtonClicked” method. The difference is we set the button at the specified index in the “radioButtons” array.
clearAll – In this method, we clear all the radio buttons by setting the images of the buttons in “radioButton” to “radio-off.png”.
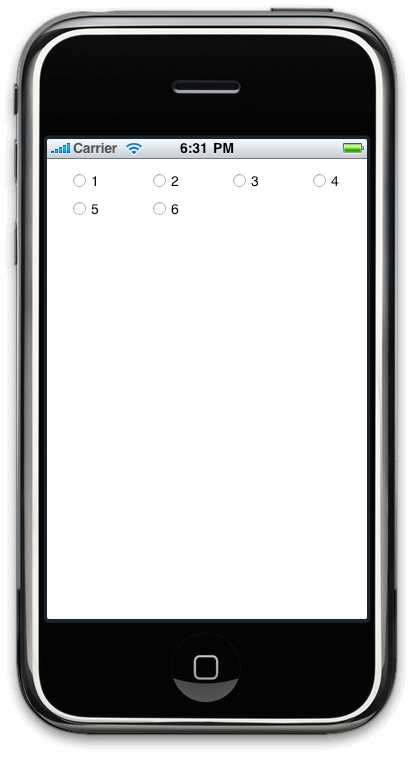
Step 6: Now that we have created the “MIRadioButtonGroup” files, put the following code in the “MIRadioButtonGroupAppDelegate.m” file so that we can test them.
Step 7: Save, build and run the project. The output will be Output1. Now uncomment the commented lines one by one and observe the output. It will be Output 2, Output 3 and Output 1 respectively.
iPhone UIButton tutorial : Custom Checkboxes
APR 30TH
Checkbox is one of the elements that is frequently required in iPhone UIs, but the traditional checkbox is not present in iPhone sdk. Switches are sometimes used in the place of checkboxes.
In this tutorial, we will see how to create a custom checkbox. It extends from UIButton class. It is used to select or deselect a particular item or more than one items in a list. For example: The “Keep me signed in” checkbox in certain apps, sound on/off , effects on/off checkboxes in Settings of a gaming app.If more checkboxes are needed, we can create them similarly.
Step 1: Create a window based application in Xcode and name it “MICheckBox”.
Step 2: Create new “MICheckBox.h” and “MICheckBox.m” files which extend from UIView.
(Classes >> Add >> New File >> Objective C Class. Select UIView in the “subclass of” list.)
Step 3: Create a new group in the Classes folder and name it “MICheckBoxUtils”. Drag the “MICheckBox.h” and “MICheckBox.m” files into the group.Now, add the images “checkbox_not_ticked.png” and “checkbox_ticked.png” to the group.
Step 4: Open the “MICheckBox.h” file and make the following changes in it.
Here, we have changed the UIView class from which it extends to UIButton. Also, we have declared a boolean property “isChecked” which
keeps a track of whether the button is checked or not. “checkBoxClicked” is the method to change the state of checkbox when it is clicked.
keeps a track of whether the button is checked or not. “checkBoxClicked” is the method to change the state of checkbox when it is clicked.
Step 5: Now, open the “MICheckBox.m” file and add the following code to it.
initWithFrame” method – This method initializes the button with the frame given by us. The contentHorizontalAlignment property allows us to set the alignment of the content (i.e image and text) of the button(checkbox). Initially, the image of the button will be the unselected checkbox, so we set the image “checkbox_not_ticked.png”. Then we programmatically link the button to the “checkBoxClicked” method.
“checkBoxClicked” method – In this method, whenever the checkbox is clicked, the image is changed from checked to unchecked and vice versa.
Step 6: Now that we have created the “MICheckBox” files, we need to test them. Hence, put the following code in the “MICheckBoxAppDelegate.m” file.
Here, we have imported the “MICheckBox.h” file so that we can create its instance. In the “applicationDidFinishLaunching” method, we create an object of MICheckbox and set its title color to black. Also, we set its title to CheckBox. Then we add the checkbox to the main window by the “addSubview” method.
Step 7: Download the source code for this tutorial here.
The output will be as follows:
The output will be as follows:
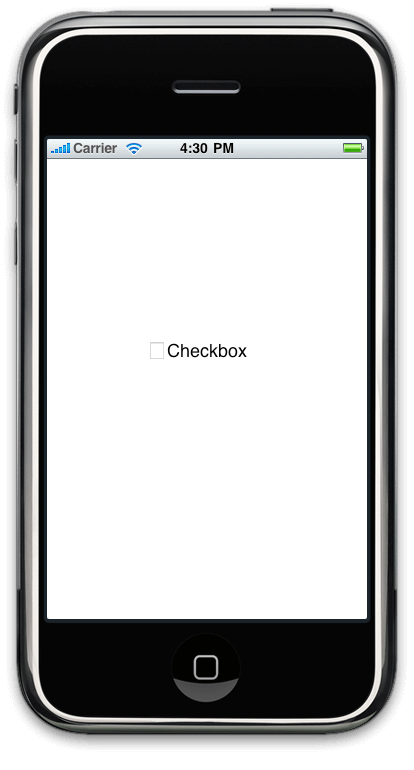
CheckBox Unticked
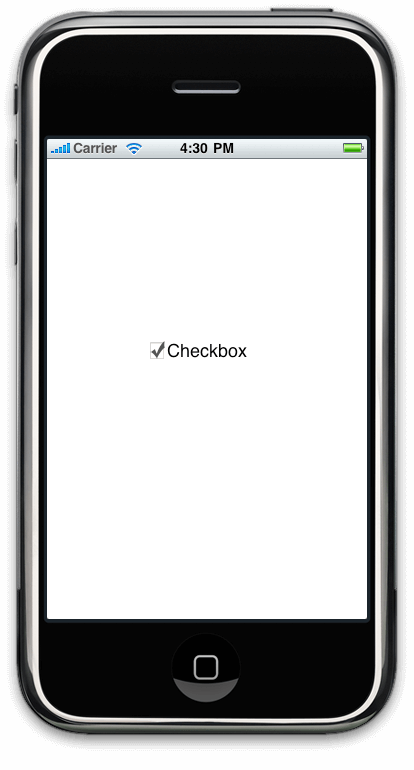
CheckBox Ticked